 As apple harvesting season continues in “Upstate” NY, the fragrant and enticing smell of apples seems to be everywhere, including at area Farmers Markets.
Years ago, having found a recipe for an “apple chutney” in the then local print newspaper, we modified it ever so slightly and it turned out to be an easy to prepare and delightful accompaniment to many a dinner meal on cooler evenings.
The original of the Harvest Apple Chutney recipe turns out to be found on the Kikkoman website and makes closer to 4 & 1/2 cups of cooked product.
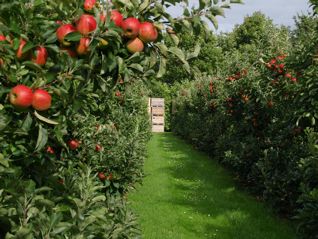
(Apple orchard image courtesy of gabriel77 at rgbstock.com)
This apple chutney recipe can be prepared either via the “hot pack method” as mentioned on the original Kikkoman recipe website; or because it is a higher acidity mixture in terms of having a lower pH, via the traditional boiling water bath “full canning method,” depending upon how long and where you plan to store the resulting product.
A product prepared using a “hot pack method” of preparation as noted below needs to then be stored in the refrigerator; while alternatively, a boiling water bath “full canning method” prepared product with a correct seal and full boiling water bath processing for the prescribed number of minutes can be safely stored at room temperature on a shelf in your pantry and also makes a fabulous homemade gift at upcoming holiday times. Processing times for boiling water bath canners will take into account the altitude where you live and the specifics of your canning equipment.
CAUTION: Anything involving boiling water along with steam and possibly pressure is serious business and you MUST follow the instructions that come with your canner and you must take full responsibility for making yourself familiar with the equipment you are using and the process involved and take all safety precautions. No one else can assume that responsibility for you–it is yours alone. Check out pdf resources available through various Extension sites for additional thoughts on this subject, such as through Utah State “Using Boiling Water-Bath Canners” or University of Nebraska Lincoln (UNL) “Apple Products.”
Pointers to keep in mind and some variations you could try are:
- Use very flavorful COOKING apples and you can mix up varieties; apple varieties grown or available in New York can include quite a range of choices;
- Halve the original Kikkoman recipe (which is what we have done to mention the modified recipe below) if you only want to make a single pint size mason jar worth of product; or increase the recipe if you are in the mood to scale it up and make up additional jars (by starting with just a pint size jar recipe as noted below, you can then double, triple, quadruple the recipe size, etc.);
- The recipe is good with either dark or white raisins;
- We like the recipe by adding 1/2 cup of water for every pound of cooking apples used (since water is lost in steam coming off the boiling mixture on the stovetop and we find the mixture cooks nicely with the water added);
- Use either a mild or sweet onion variety;
- Use the Less Sodium version of Teriyaki Marinade & Sauce product to decrease the sodium level in the recipe and we suggest only 1/3 cup of that teriyaki marinade per pound of cooking apples used;
- Try substituting white or apple cider vinegar for the rice vinegar called for in the original recipe;
- If you halve the rest of the ingredients in the original Kikkoman recipe, keep the apples at a full pound and not less, and keep the minced fresh ginger root at 2/3 the amount listed in that original recipe, so instead of using 1.5 Tbsp of ginger root per pound of cooking apples, use 2 Tbsp. The ginger root flavor element in the recipe is wonderful! (Note that in the modified recipe below that is why we specify 2 Tbsp of ginger root).
Apples image courtesy of Lusi at rgbstock.com
YUMMY APPLE CHUTNEY
(Based on Kikkoman recipe for Harvest Apple Chutney)
(Yield: 2 cups)
Using adequate safety precautions, prepare enough sterilized glass “Mason” storage jar(s) in excellent condition, new lids, and appropriate metal band(s) (clean, rust-free, and after sterilizing, air dried) per canning method (even if you only plan to use the “hot pack method” when it comes to cooking and ladling the chutney into jars), (based on how much product you are making) to be ready when recipe is done. Prepare jars, lids, and bands in a large separate pot where they will be in boiling water and removed only when it is time to fill the jars since you want to fill only hot, sterile jars with product.
For 2 cups of product as created by this sized recipe, you’ll need:
- 1 pint size (holds 2 cups of product) or else 2 – half-pint (single cup) size glass mason jar(s) in excellent condition.
For each jar you will need:
- 1 new lid, and
- 1 clean, dry, rust-free band.
You’ll also need:
- a 3 qt pan with cover for a 2 cup batch, or
- if making a larger multiple batch, you’ll also need a 5 qt or larger Dutch Oven with lid (exact size will depend upon batch size)
- heat safe cooking utensil/spoon appropriate for lining of the pan
- appropriate ladle to work with the mouth size opening of the jar(s)
- canning jar tongs
- heat resistant silicon mitts
- a wire cooling rack
- jar labels, and
- marker to write on the labels
As already mentioned, even if you only use the “hot pack method” to process the product, then you still need to sterilize any jar(s), lid(s) and band(s) so that can be done in a Dutch Oven or similar capacity pan as described using canning jar tongs to handle those sterilized items, a wire cooling rack, and protective heat resistant silicon mitts.
If you decide to go beyond the “hot pack method” to the boiling water bath “full canning method” then you will also need a canner to hold the jars upright in during the boiling water bath processing, a rack to go inside the canner to rest the jars on during the boiling water canner processing, and possibly some additional cooling rack(s).
IMPORTANT: Please follow the directions that come with your canner as what we list here is merely infotainment and a skeleton listing of some of the potential items you might use in the boiling water bath “full canning method” process and is NOT meant to substitute for the exact instructions that come with your canner, which are the instructions you should follow exactly. (Again, no one but yourself can take responsibility for your actions and for following safety precautions).
Frankly, we usually make multiples of this recipe while we are at it since it doesn’t take all that much longer to prepare the ingredients to make a scaled up quantity larger multi-batch of product. Any size jar of this delicious product really does make a tasty gift!
Ingredients:
- 1 lb. cooking apples
- 1 c. chopped onions
- 1 c. sugar
- 1/2 c. raisins
- 1/2 c. water
- 1/3 c. prepared Less Sodium version of Teriyaki Marinade & Sauce product
- 1/4 c. white or apple cider vinegar
- 2 T. minced fresh ginger root
Method:
- Peel, core and coarsely chop apples.
- In a 3 qt sauce pan for a single recipe (or larger pan for scaled up recipe amount), combine apples with onions, sugar, raisins, water, less sodium teriyaki sauce, vinegar and fresh ginger root, bringing the mixture to a boil over medium-high heat.
- Reduce heat to low; simmer mixture uncovered, for about thirty (30) minutes or until thickened, stirring occasionally to prevent sticking of mixture to pot. Watch carefully and do not allow the mixture to burn!
- Ladle carefully into sterilized mason jar(s), cover with lid and metal band, and refrigerate; or if making for shelf stable gift giving later on, you might want to use a boiling water bath canner to process the mason jars containing the mixture (follow any instructions for your canner EXACTLY). Even using the “hot pack method” per se, when a good seal is achieved, the jar lid center will depress.
If you decide to “hot pack method” process the product, at first be sure to have any band screwed down loosely over any lid (every lid should form a full seal), then label and date the jar. Any completely cooled jar can have its band/cap tightened for longer term refrigerator storage.
If you decide to use the boiling water bath canner process for the filled jars, the bands must be fully screwed on over the lids and the lids must be water tight sealed to keep the boiling water out of the product.
Remember that you CANNOT store any kind of “hot pack method” processed mixture at room temperature under any circumstances.
Do not let the fact that you will have a “seal” on the “hot pack method” processed jar fool you. This mixture is stable at refrigerator temperature ONLY (and NOT at room temperature) just as a jar of OPENED jelly or jam or preserve would be limited time stable stored under refrigeration.
Only jars that have gone through being “canned” in a boiling water bath canner according to the canner’s (manufacturer’s) or equivalent relevant directions can later be stored at room temperature on a shelf.
Always check jar seals before opening and using any jar contents. On a properly sealed jar, the lid center should be slightly depressed and the lid should make a “pop” sound when the seal is broken and the lid center should be what is “popping” up. Please remember to reheat product thoroughly before serving as desired. Once opened, please store any remaining jar content in the refrigerator.
In our opinion, this chutney needs at least three (3) days for the flavors to meld (blend).
This apple chutney is delightful served reheated as a complement to pork, chicken or beef. Enjoy!


